Without any further ado here are some photos I took of my best friend’s bridal shower. We had it at the Alcove and I would definitely recommend it for any small gathering. The food is delicious and the cottage is intimate.


Without any further ado here are some photos I took of my best friend’s bridal shower. We had it at the Alcove and I would definitely recommend it for any small gathering. The food is delicious and the cottage is intimate.
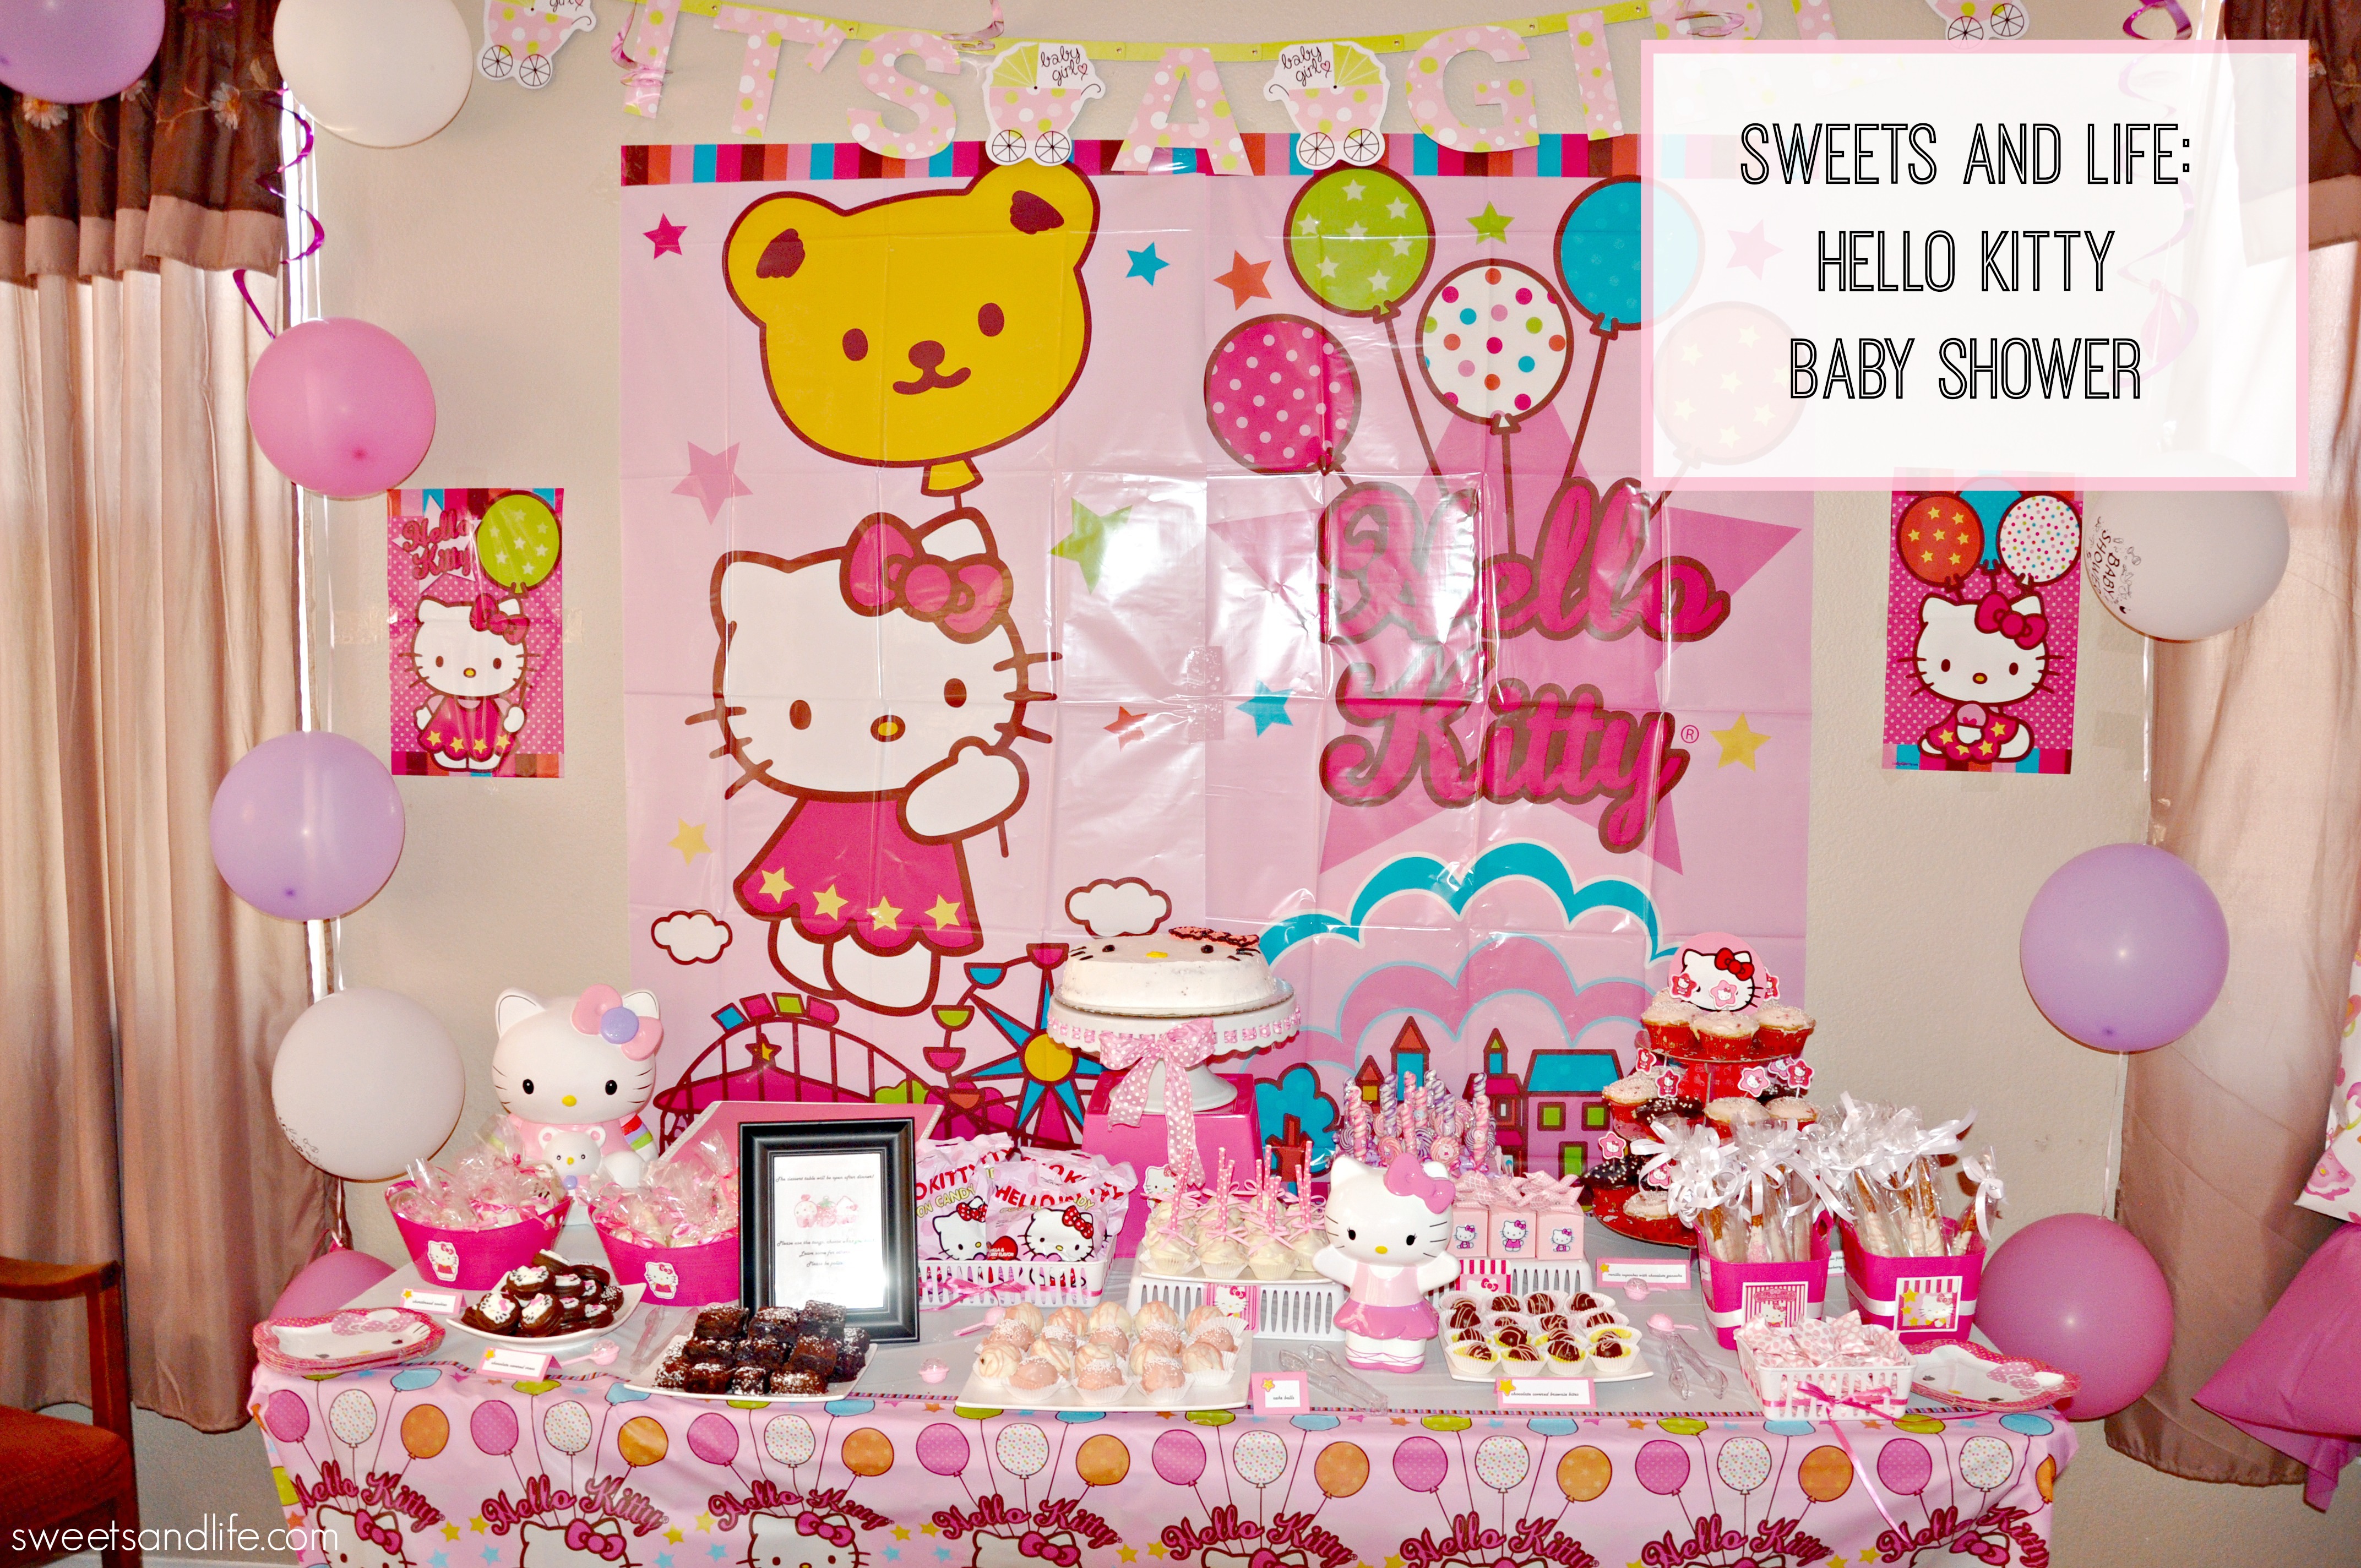
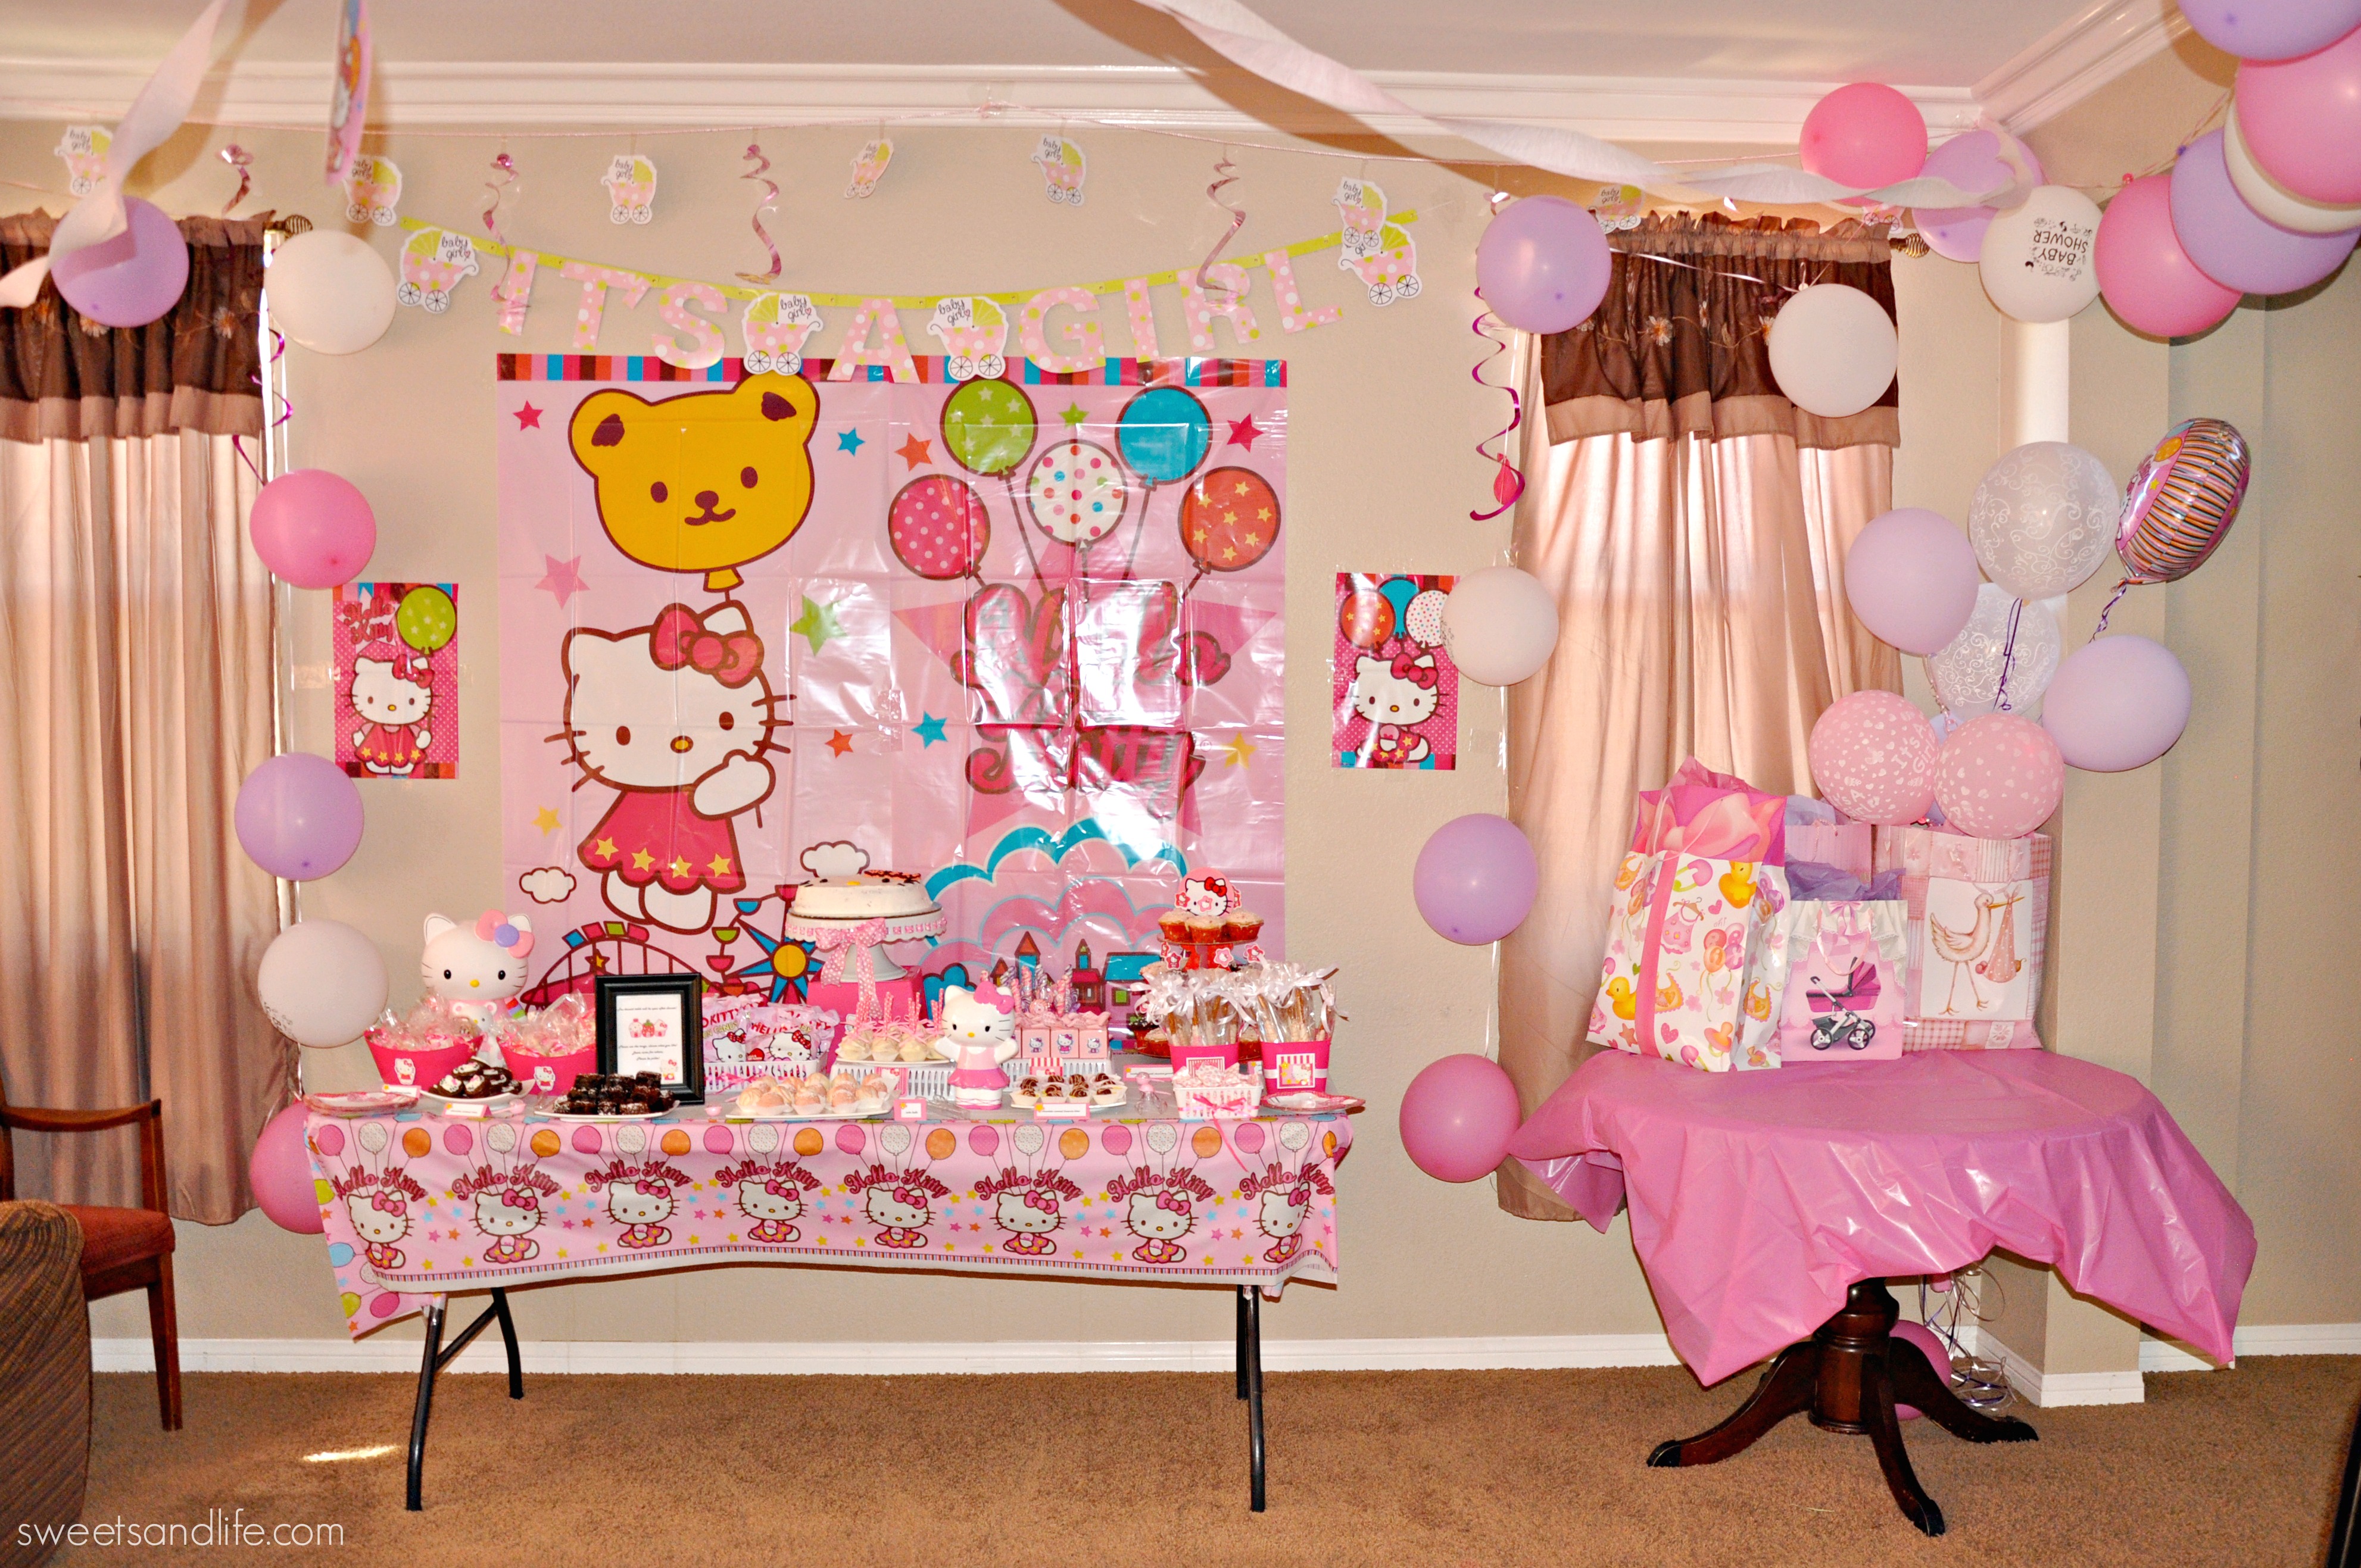
A few months ago my half-sister approached me and asked me to help her with her son and daughter-in-law’s baby shower. If you have been following my blog you know that she had me by the time she announced that it would be a pink Hello Kitty baby shower. I helped her out by doing the dessert table for her.
I began a baking a week before the baby shower because I’ve learned from previous parties that sugar cookies work better with royal icing when they are completely dry. I used Sugarbelle’s recipe for sugar cookies because I’ve always had good results with it.

Once completely dried I placed the cookies in cellophane bags and I added pink ribbon that I already had.

I worked on the Hello Kitty cake the day of the baby shower. I baked a Hershey’s chocolate cake and frosted it with a buttercream frosting. I use the Hello Kitty cake pan mold and I loved how the cake turned out.

My mom loves chocolate covered pretzels so I had to include those in the dessert table. I purchased the pink baskets at the Dollar Tree and the Hello Kitty in front of the baskets are actually stickers placed over cardstock.

Another must have item in any dessert table are chocolate covered Oreos which I love.

I made the same type of sign I did for my daughter’s 1st birthday dessert table.
The sign says:
The dessert table will be open after Dinner!
Please use the tongs, chose what you like!
Leave some for others, Please be polite!

Here’s the final dessert table. I baked brownies, cake pops, cake balls, brownie bites, and cupcakes. I used Billy Vanilla, Vanilla recipe for half of the cupcakes. My niece and sister decorated the background.

 I hope you guys enjoyed the dessert table I created for baby Natalie. I’m glad to say that last week my nephew and his wife had a healthy little girl.

Update: Thanks for stopping by and checking out out the centerpieces I made for my daughter’s 1st birthday!
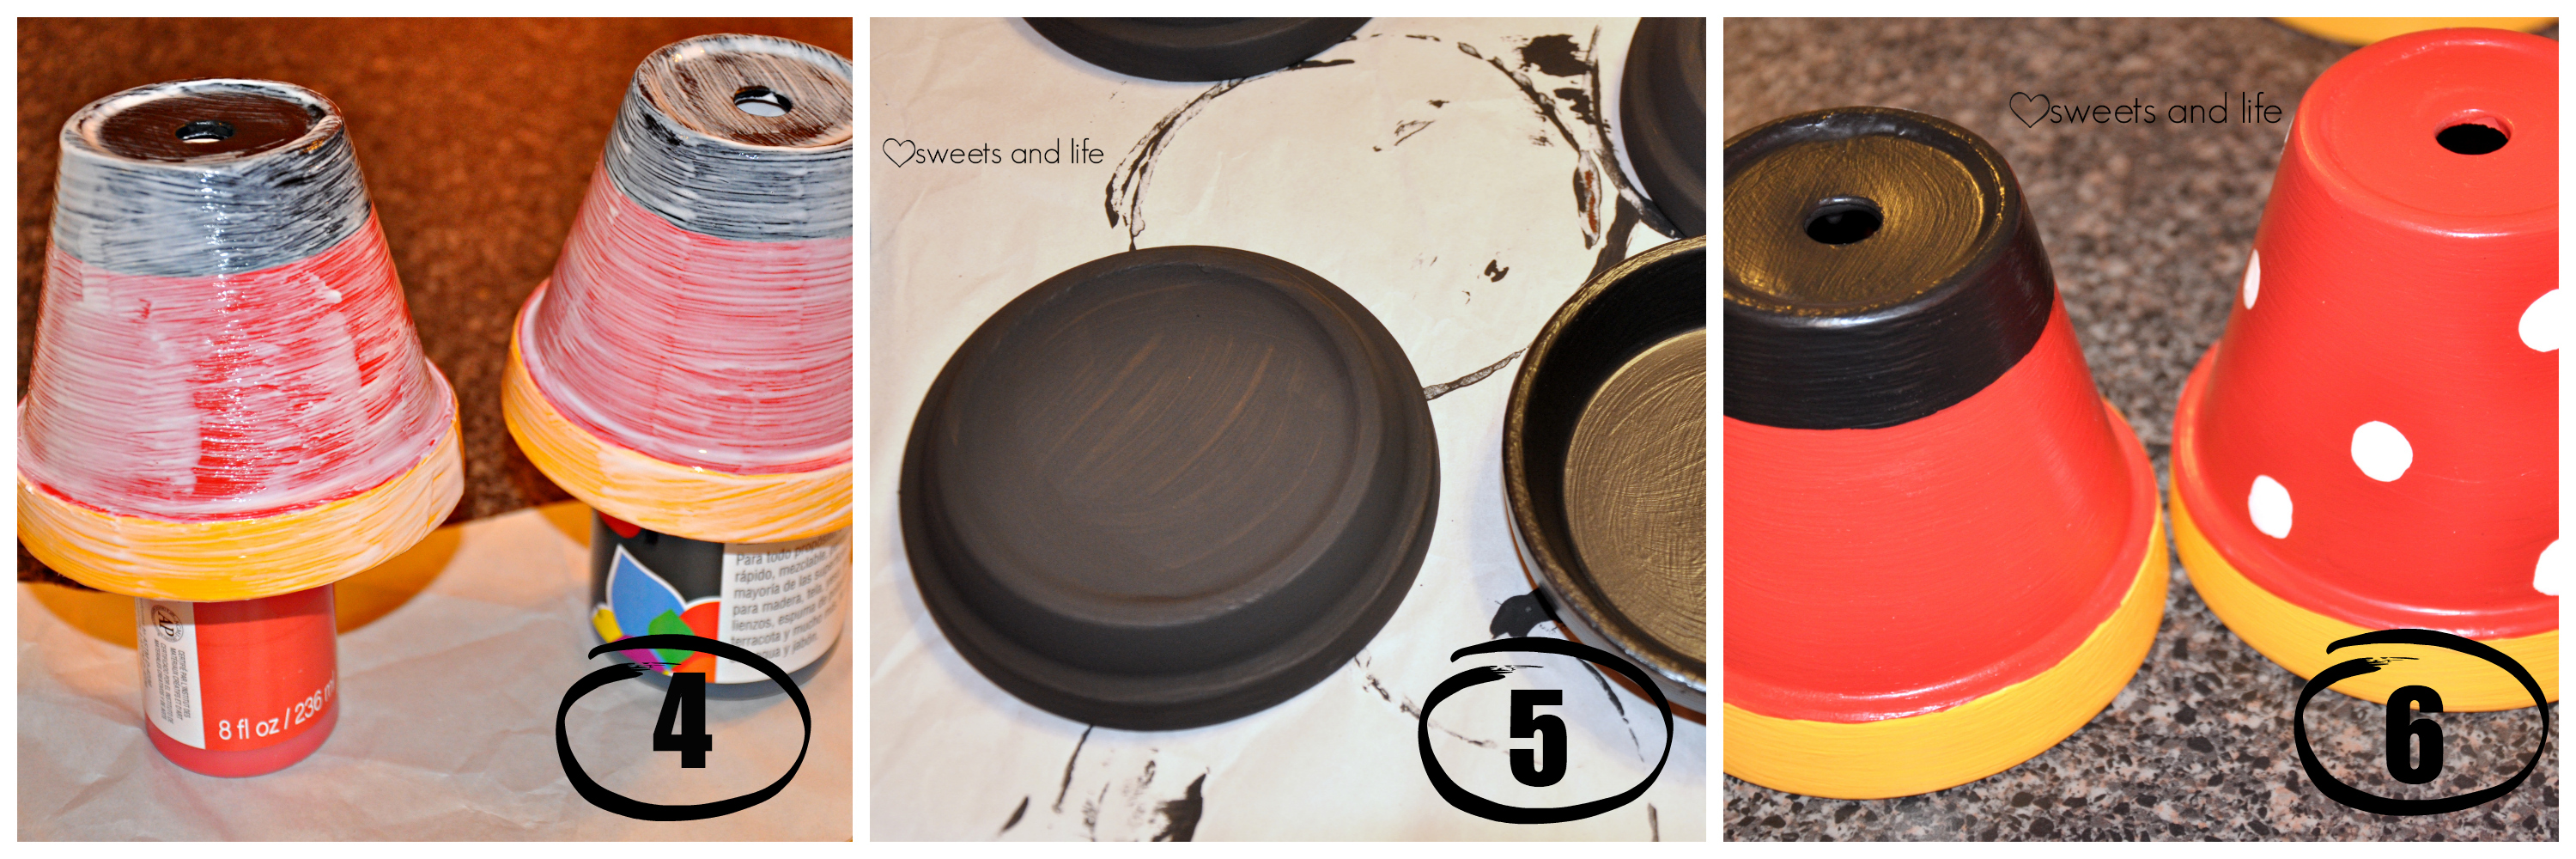
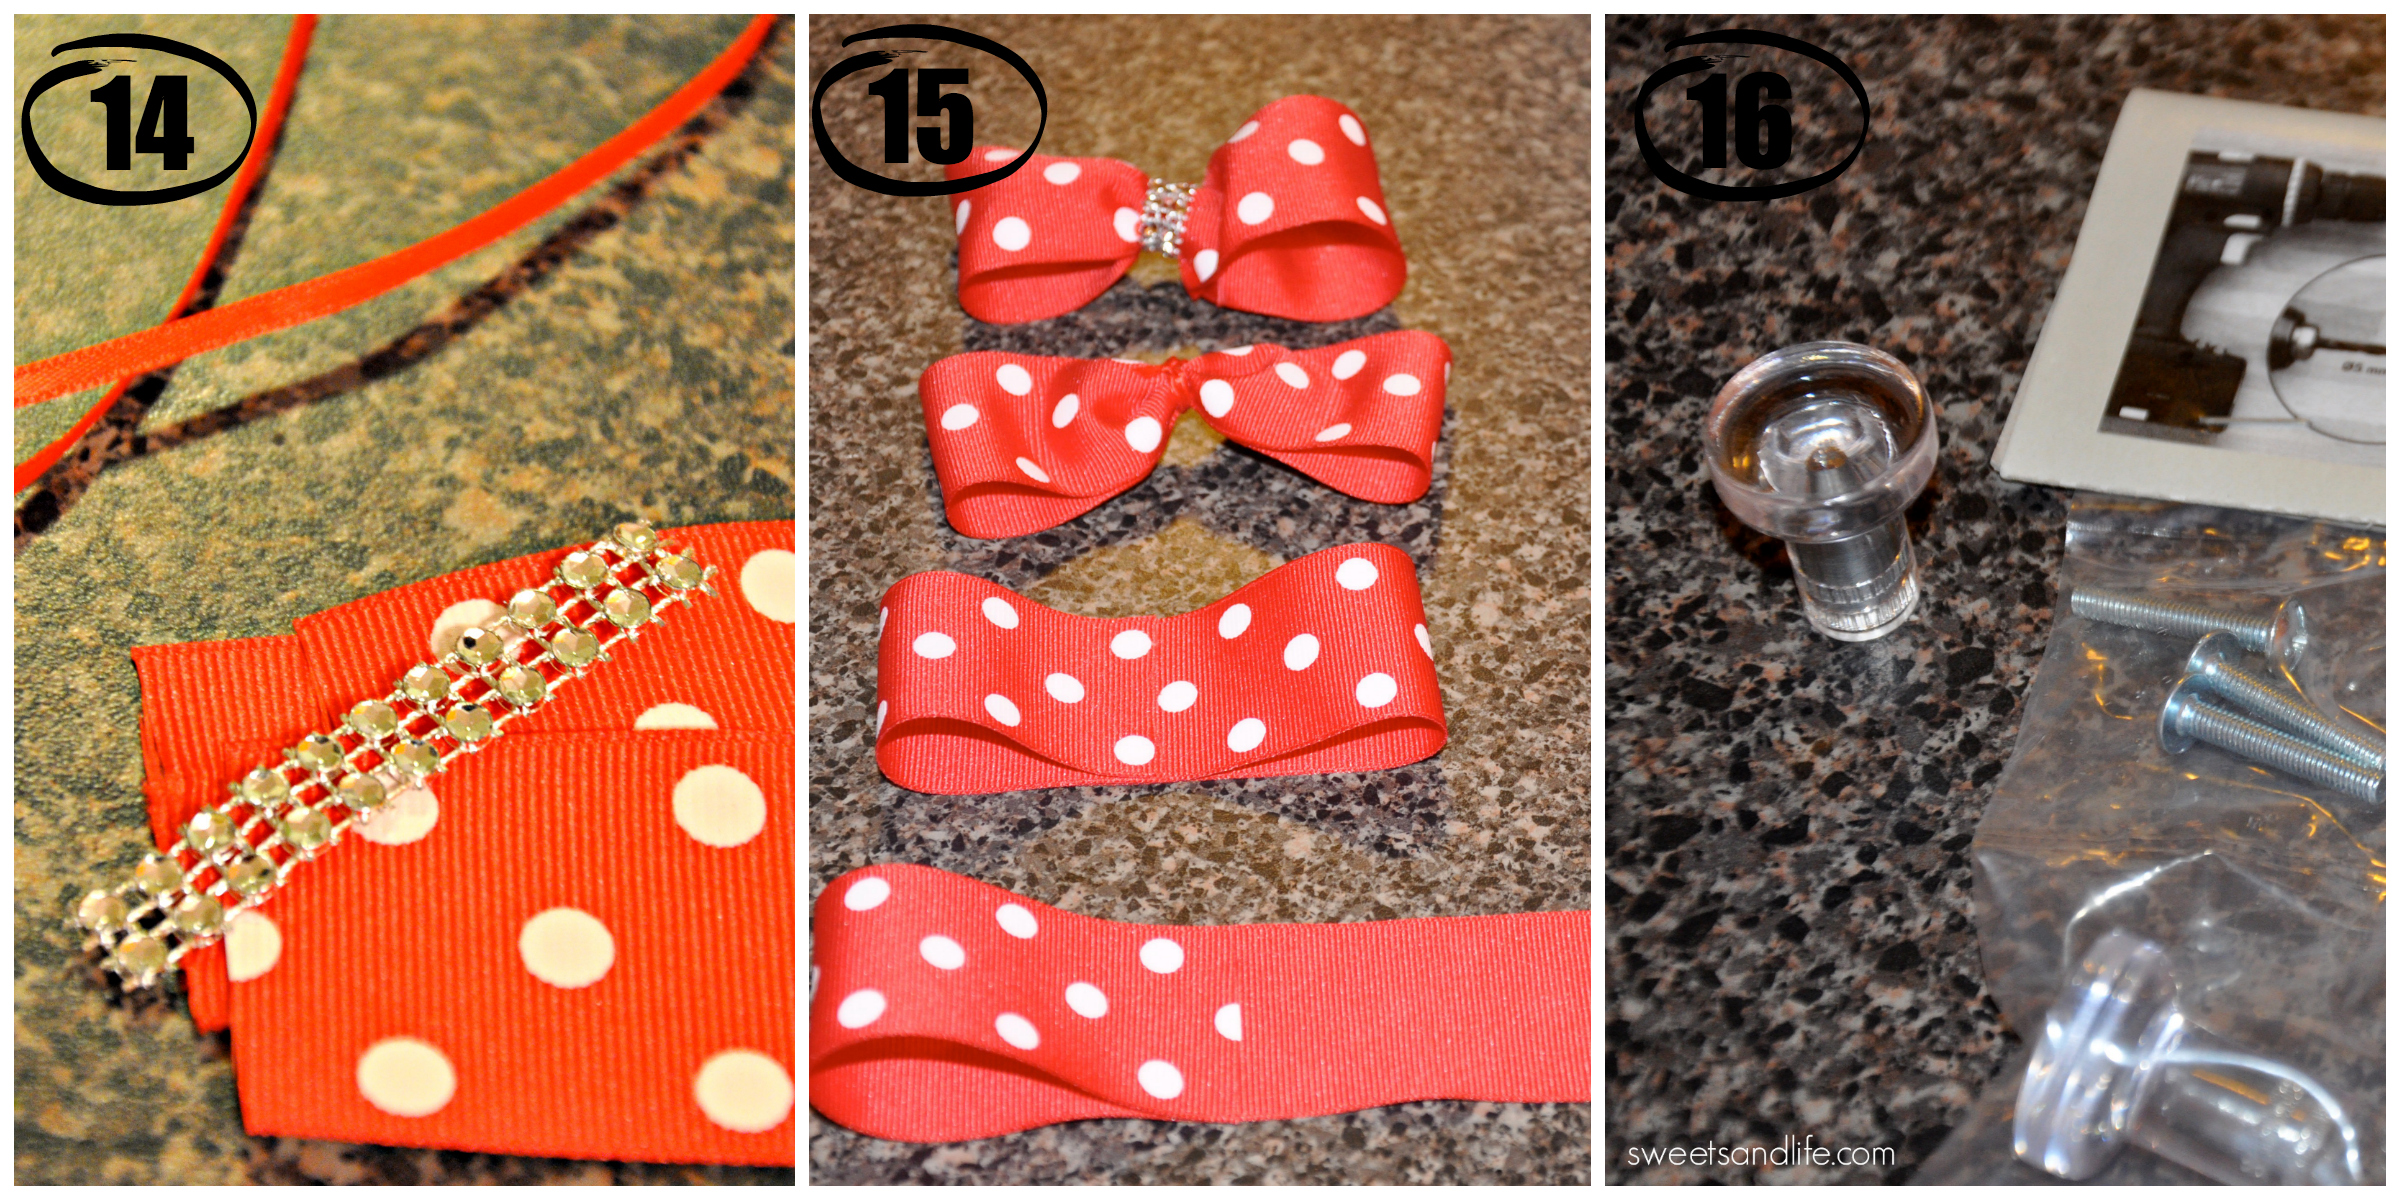
One of the cutest projects I did for my daughter’s 1st birthday party was the Mickey & Minnie Gumball Machines. I received so many compliments from this project and it was pretty easy to make. I followed Damaris’ directions on how to make these colorful centerpieces and they turned out super cute. For complete directions on how to make these please go HERE. Please enjoy the photos I took of the process.


 Tips:
Tips:
I filled the gumball machines with candy from the Dollar Tree.
This project is easy but be aware that it requires a lot of time to dry.
Be prepared to get glitter everywhere!
White buttons- Michael’s.
Door Knobs for lids- Ikea.
Minnie Bow- Fabric Barn.
Fish bowls- The Dollar Tree
The remaining supplies – Moskatels
Here’s a few answers to the questions I have been asked:
Feel free to ask me any questions. I will add the answers on here. Thank you once again for stopping by.
Now that the party is finally over I’m ready to post some of the DIY projects I did for my little Buttercup’s birthday. This is one of the first DIY projects I tackled. I was inspired by this photo from Catch My Party.

Supplies Needed:

If you have a Cricut it’s very easy to make but if you don’t just do a simple Google search and you’ll come across a ton of different templates.

Once you have your supplies you can begin to put everything together. Place your cutlery one on top of each other. I put the knife on the bottom followed by the fork and the spoon. Roll the napkin on top of the cutlery and lay it flat.
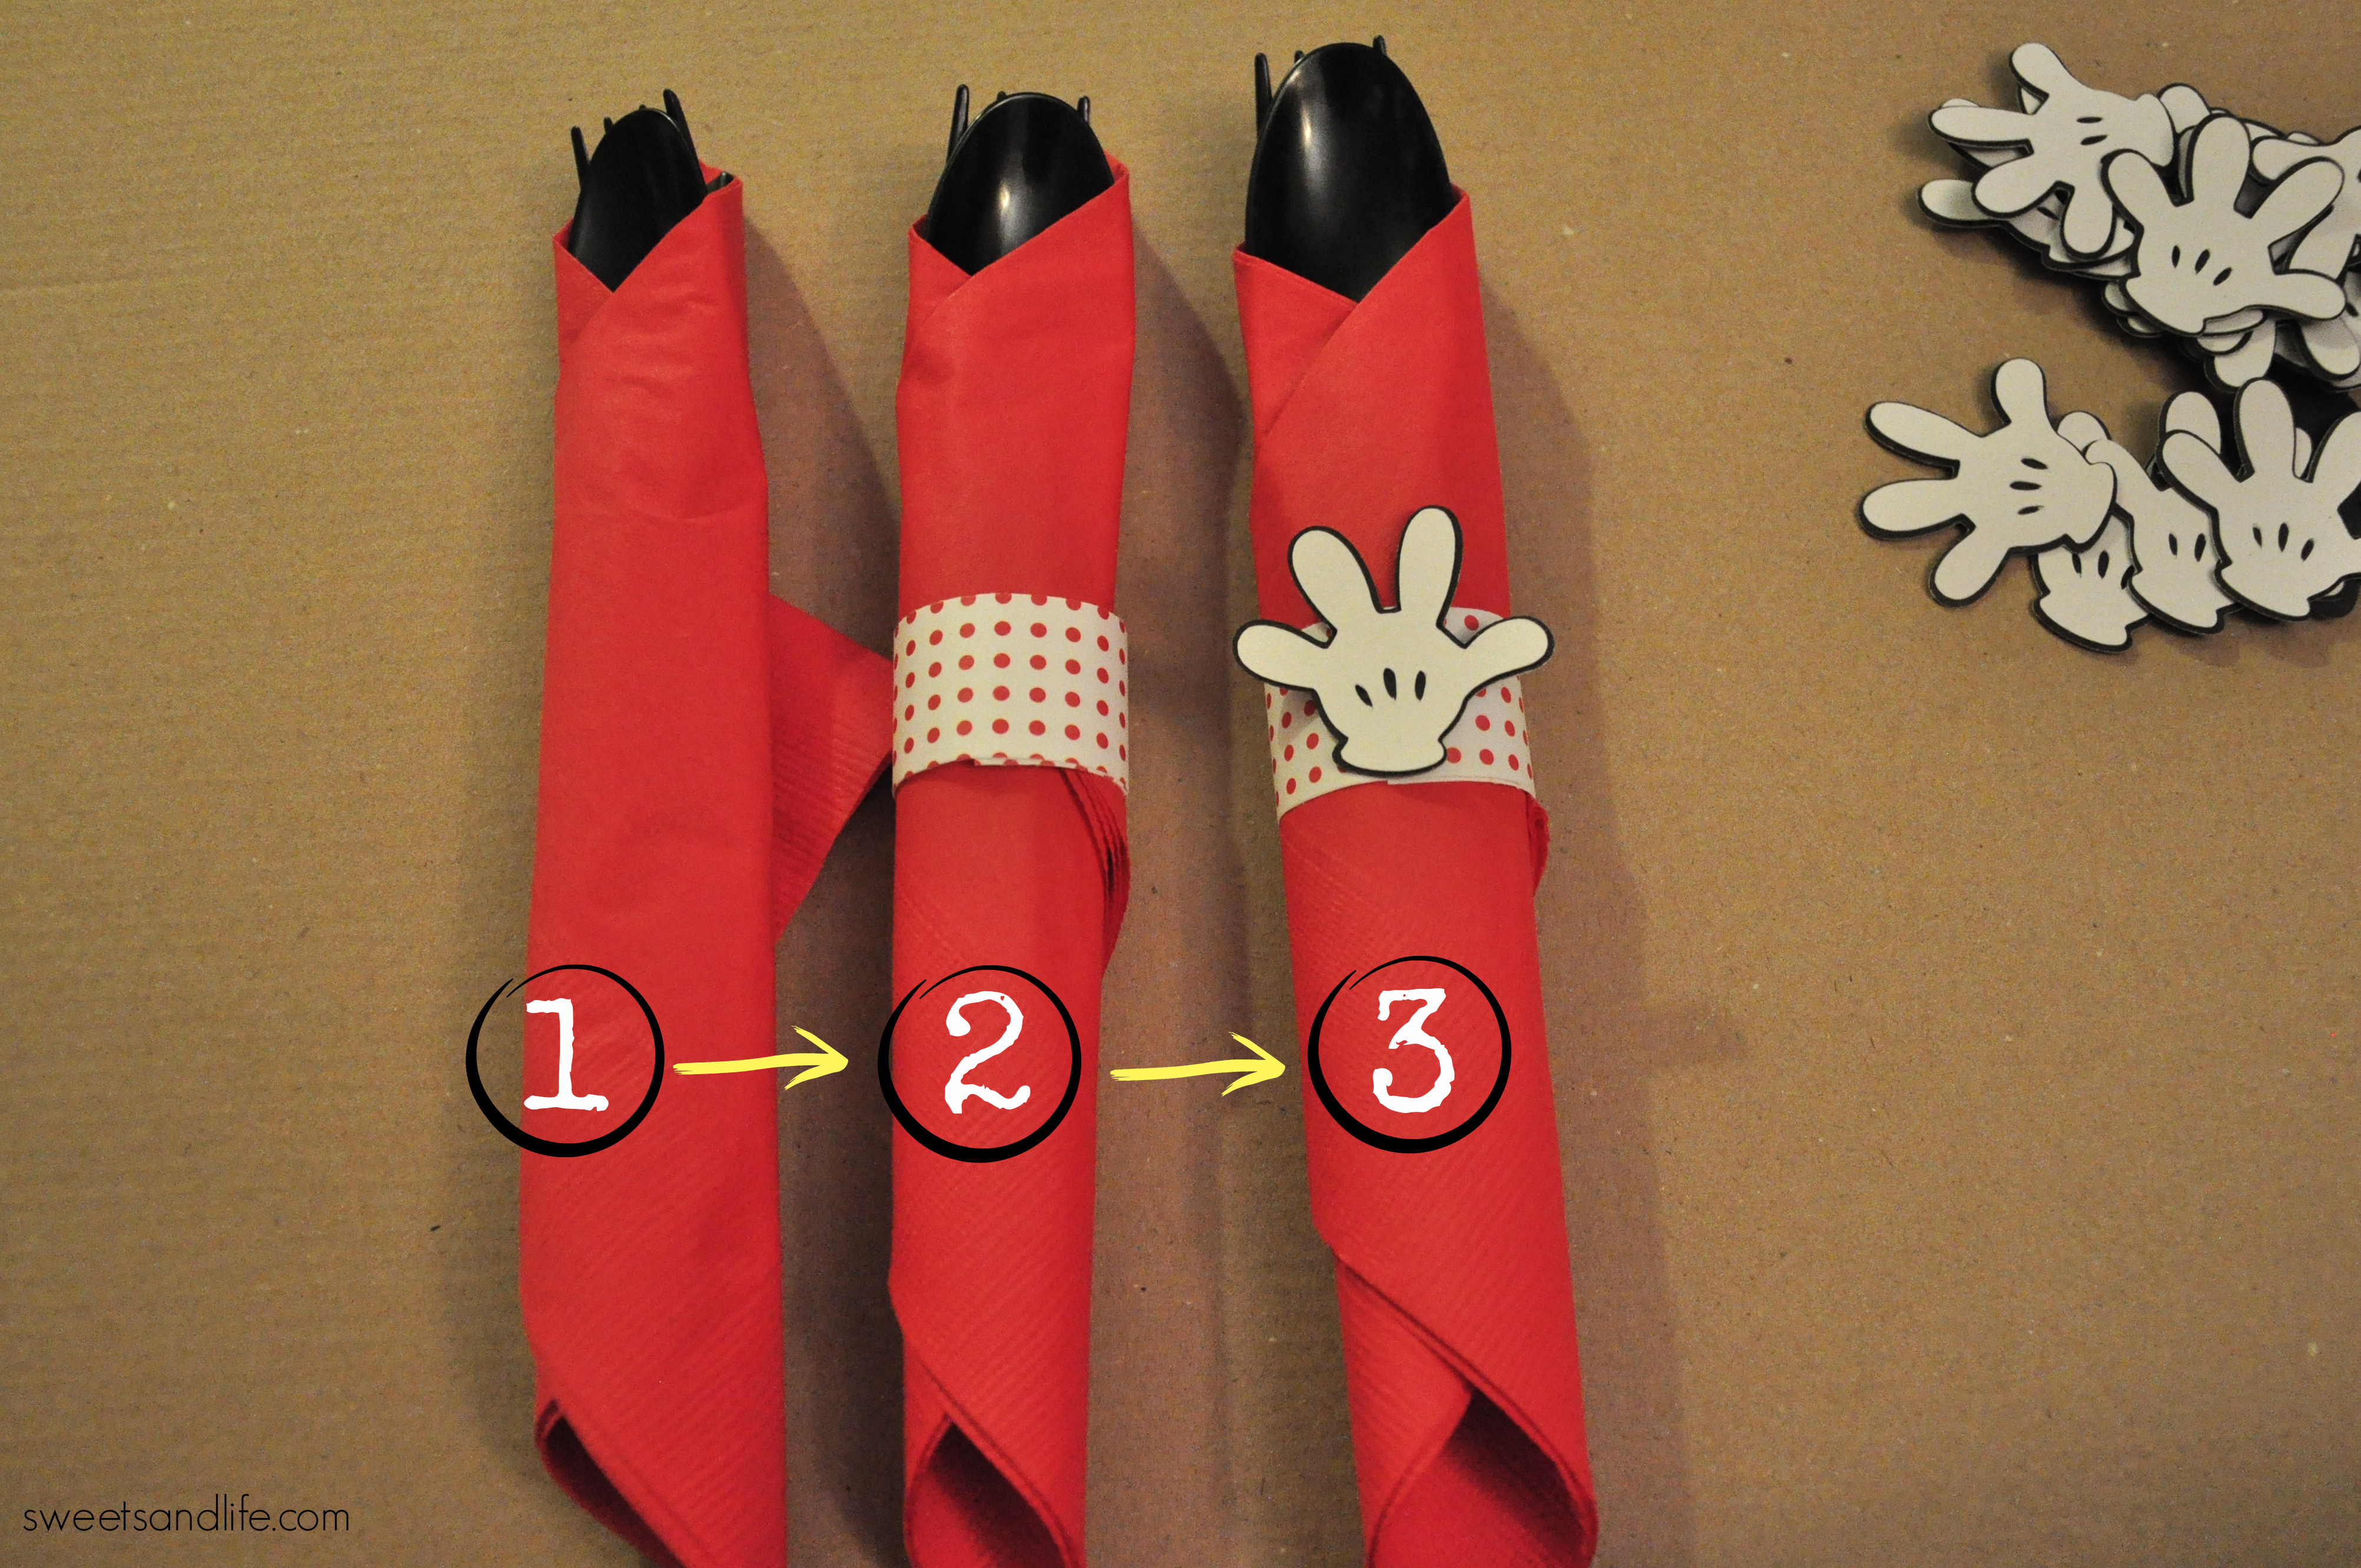
Take your decorative card stock or ribbon and wrap it around the napkin. I put a strip of glue tape on the very end to hold it together. I used the same type of glue to put the Mickey Mouse glove on the polka dot paper. Now there you have it all completed. I did about 100 settings with different types of napkin and cutler combinations. You can use this same method with ribbon and using your glue gun to hold it together. I’ve always thought that it was the little things that make parties memorable.
When I was growing up my mom always made a big deal about my birthday and to this day I can tell you exactly how I spend each one. I didn’t have elaborate parties but nonetheless she always seem to make them extra special. Now that I have a child of my own I’m extremely giddy about planning her 1st birthday party. If you follow me on Pinterest you have probably seen my Mickey & Minnie board. It isn’t a big surprise to anyone that I would start with a Disney theme for my daughter’s 1st birthday because after all Walt Disney did say, “I only hope that we never lose sight of one thing – that it was all started by a mouse.”

1.) Date
My little Buttercup’s birthday falls on a weekday so we decided to celebrate it on the following Saturday.
2.) Time
My mom was shocked when I told her the party was only going to be 3 hours long and I had to explain to her that it’s a kids party. I think that 3 hours is more than enough time for a 1st birthday party. I have given my Hubby instructions to make sure our little Buttercup takes her nap before her party.
3.)Theme
Choosing Mickey and MInnie was a given but trying to decide on what colors to use was a little more work. I can’t seem to find the traditional colors for Minnie so I’m going to have to DIY most of her things. I’m going to stick with the classic red, white, black, and yellow as colors for the party. Oh and you bet there will be a ton of polka dots everywhere.
4.) Guest list
Deciding on who to invite is always hard for me because I want to include everyone in our lives. We’re inviting immediate family, close friends and a few of the Hubby’s co-workers. I hope there’s a ton of kids because I’m planning a lot of surprises for them.
5.) Venue
Since we don’t have a house to hold my daughter’s birthday at we had to look for a venue that would allow me to bring in lots of desserts and it had to be indoors. We are lucky to live in Southern California because we have a lot to choose from too bad most of them cost an arm and a leg.
6.) Menu
I really hate going to a kids party where only “adult” food get’s served at. We will be serving lots of kid friendly foods and I’m still trying to finalize what to serve the adults.
7.) Invitations
Another things that irritates me about parties nowadays is when parents send out invites through email or through a Facebook announcement. For heaven sakes please do yourself a favor and go to the dollar store and pick some simple invitations. I believe that if people are in a budget then they can hand them out themselves rather than sending them out. I’m going to be making my little Buttercup’s invitations because I love the process working with stationery.
8.) Decorations
I’m doing all the decorations myself with my new Cricut machine but if you have never been to a dollar store please find your nearest one.
9.) Games or Entertainment
Hopefully the weather cooperates with me and I’m able to setup carnival like games outside otherwise I’m going to have to have a backup plan.
10.) Fun!
Once all the planning is done and it’s the day of the party I’m planning on enjoying every bit of it. The reason I’m crazy about planning every last detail is because I’m less worried if anything goes wrong the day of the party. I mean I can’t do anything about the weather or about who’s going to show up so I’m not going to stress out about those things. I’m going to sit back and have fun.
Don’t worry in the next few months I’ll come back to this list and elaborate a tad on each item.
If you are planning a Mickey and Minnie in the future come back to check out my DIY projects and a mini giveaway I will be hosting early next year.
